Block Sender offers more advanced blocking features in addition to the more common address blocks. If you know the IP address from which your spammer sends emails, you can block their emails using it. There are quite a few ways to block emails in Gmail, but this can be the most effective one if used correctly.
Note that IP address blocks are available for Plus or Pro accounts only.
For blocking IP addresses, Block Sender supports the following formats:
- IPv4 address types
- IPv6 address types
- Wildcard matching (i.e. 192.168.1.*)
- CIDR notation (i.e. 192.168.100.0/24)
When creating this type of block, take caution not to block a popular email service’s IP address, like Gmail or Yahoo Mail. If you need assistance with this, don’t hesitate to contact us.
Note: Keep in mind that the IP address of the sender’s website is not necessarily the IP address in which they send emails from. The best way to determine their email IP address is from the headers of one of their emails. We’re currently working on a way to help you find and block these IP addresses automatically.
To create these kinds of blocks, follow these instructions for either the browser extension or web-based dashboard.
Using the Browser Extension
- Log into the Gmail account you want to apply the block on.
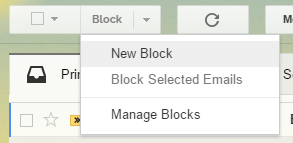
- Click the Block button in the toolbar and select New Block.

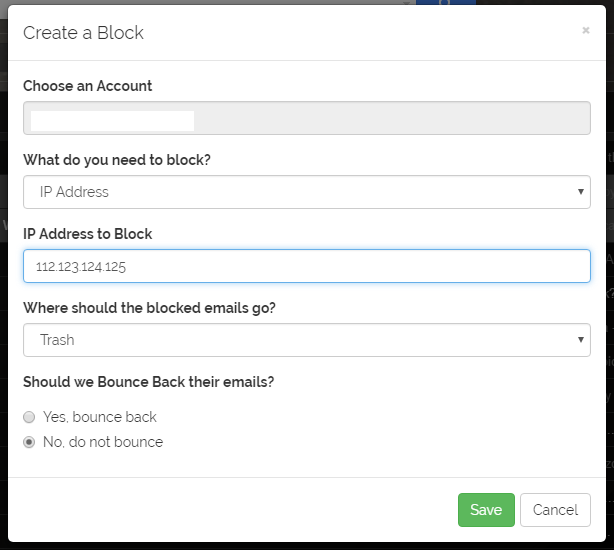
- Use the following settings to create a Block in this order:
- Choose IP Address for “What do you need to block?”
- Type the IP address you want to block under the “IP Address to Block” field
- Choose where you want the blocked emails to go
- Choose if you want the blocked emails to be bounced back

- Click Save
Using the Block Sender Dashboard
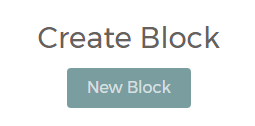
- Go to the Blocks section of your dashboard.
- Select New Block.

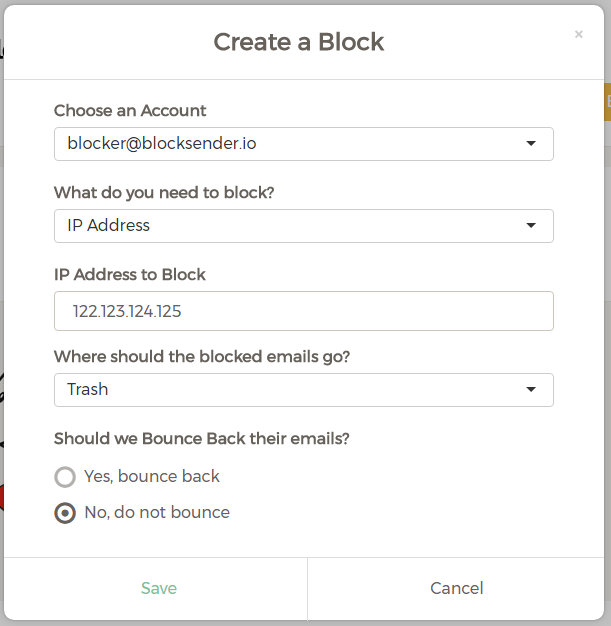
- Use the following settings to create a Block:
- Select the account you want to apply the block to
- Choose IP Address for “What do you need to block?”
- Type the IP address you want to block under the “IP Address to Block” field
- Choose where you want the blocked emails to go
- Choose if you’d want the blocked emails to be bounced back

- Click Save.
If you have any questions on how to get started, best practices, or anything else, feel free to reach out to [email protected].
